Fitting an AussieSpeed alloy GT Shaker to a reproduction fibre glass shaker assembly.
Here is something that will lift your ride; how about fitting one of our GT shaker lids to your old beaten up fibre glass one.
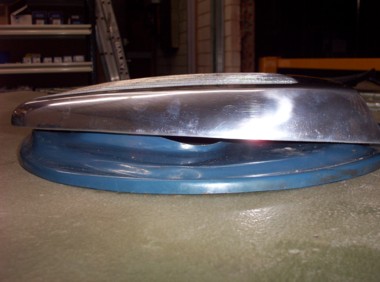
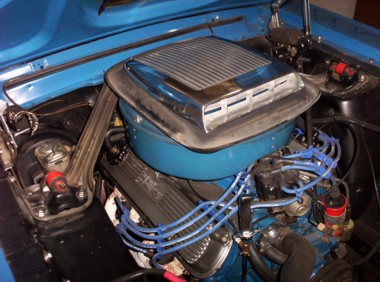
Interesting enough, I will bet you have probably not had it apart in a while and have forgotten how rough it is, I know I did. Now I have not a clue who originally made this one, I brought it from a swap meet many years ago and it has been on my 1967 Mustang for along time. You can see from these photos how the rubber that is between the shaker top and the air cleaner lid hides the poor fit. The good news is this rubber will aid our conversion too because it will be no better fit than it was before.
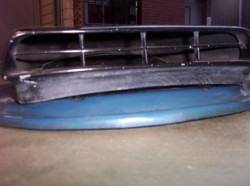

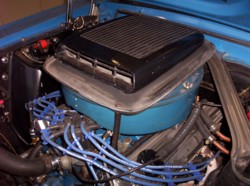
Now remember we are not trying to produce a concourse imitation here, what we are doing is tricking up our daily hack or keeping within our budget and having some fun by spending as little as possible, in essence all we are after is the cool look for a little outlay. As you can see from the photos our Stang has been on the road for a while and it is a bitza anyway [bits of this & bits of that, had a rough previous life] but I look after it as much as can and I like to tinker around with it. Now the following photos show how the alloy GT shaker does not follow the contours of the air cleaner lid either but at least it is straight and square so it will be an improvement on what it was.
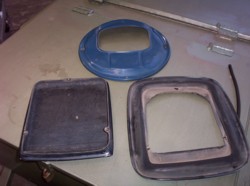
Here we show the 3 parts to the top assembly and the difference between the two Shaker tops.
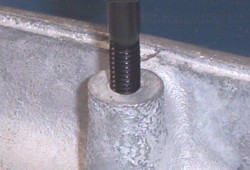
The solution for fitting the new Shaker top to the old air cleaner lid is to use some 5/16 UNC all thread to space the alloy Shaker away from the old lid so that the rubber gets clamped nicely between the two. You will need to redrill the old air cleaner lid to suit the new shaker. The all thread allows you to adjust the clamping of the rubber which will pull it nicely into shape.
Use large diameter washers on the fibre glass lid so as to spread the load and avoid cracking the old lid because you will find they are very thin. Use nuts on the between side to tighten up on so that the clamping forces are not trying to pull the old air cleaner lid out of shape, towards the shaker top. By adjusting where these between nuts sit you can get the new shaker to clamp down a little on the rubber. It squares up the rubber nicely once you have tightened up the bottom nut that clamps the old air cleaner lid to this between nut, remember to use some big washers.
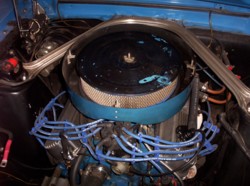
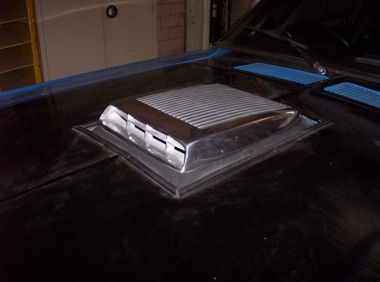
So there you have it, all done. I fitted a polished unit here to really show the contrast and it looks good against the blacked out bonnet on the Stang. This took about an hour to do, it is not hard and it was kinda fun. Looking at the dust on the bonnet I think I will go and wash it now.
Click on this Mustang photo to see larger
.jpg)


.jpg)


.jpg)